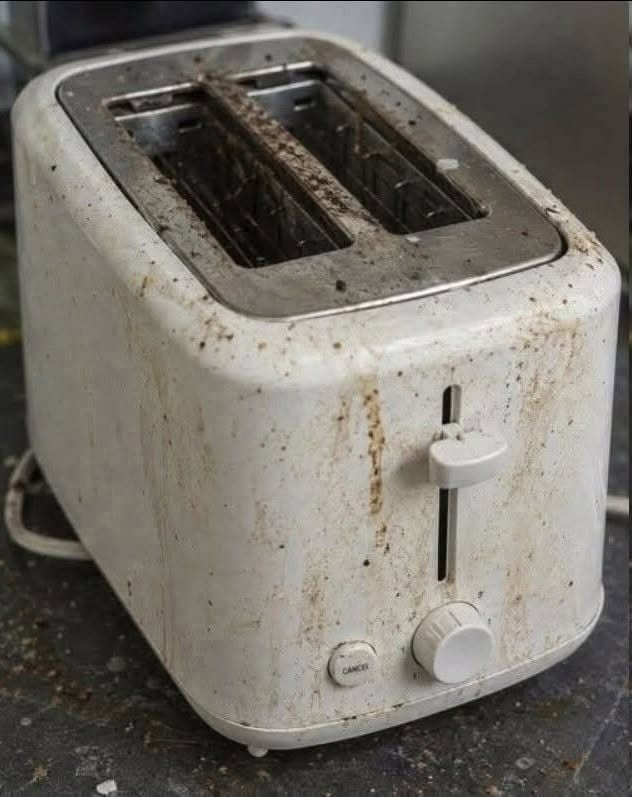
My Tenant Left My Toaster in This State. I Was Furious—But Here’s How I Cleaned It Safely
I opened the kitchen cabinet and nearly dropped my keys.
My toaster looked like it had survived a small kitchen disaster.
There were crumbs everywhere. Burnt bits were stuck around the slots, the crumb tray was filthy, and the outside was covered in greasy fingerprints.
My first thought was, “What on earth did my tenant do to this thing?”
My second thought was more practical:
Can I clean it without destroying it—or creating a fire hazard?
The answer is yes, but the most important part is knowing what not to do.
1. Unplug It First
Before touching anything, unplug the toaster and let it cool completely.
Don’t clean a toaster while it’s connected to power, and never put the appliance in water. (RTINGS.com)
This is the step you absolutely shouldn’t skip.
2. Empty the Crumb Tray
Most pop-up toasters have a removable crumb tray.
Pull it out and dump the crumbs into the trash.
Wash the tray separately with warm, soapy water and let it dry completely before putting it back. (RTINGS.com)
If the tray is particularly greasy, let it soak for a while before scrubbing.
3. Get the Crumbs Out of the Slots
Turn the unplugged toaster upside down over a garbage can or sink and gently shake it.
Don’t bang it against the counter. Excessive shaking or hitting can damage the appliance. (RTINGS.com)
For crumbs that refuse to come loose, use a dry, soft brush, such as a clean pastry brush or toothbrush.
And please don’t stick a knife, fork, screwdriver, or other metal object inside. Metal objects can damage the heating elements and create an electrical hazard. (University of York)
4. Clean the Outside
For fingerprints and greasy residue, use a soft cloth that’s only slightly damp.
A little mild dish soap can help with stubborn grime. Apply the cleaner to the cloth rather than spraying it directly onto the toaster. (Tineco)
Pay special attention to:
- The sides
- The lever
- Around the slots
- The crumb-tray area
- Buttons and controls
Keep moisture away from the slots and electrical components.
5. What About Burnt-On Grime?
This is where you need to be careful.
Don’t scrape heating elements aggressively, and don’t pour cleaner into the toaster.
For stubborn residue on accessible exterior surfaces, use a soft cloth or brush and a cleaner that’s compatible with the toaster’s finish. Some manufacturers specifically warn against abrasive cleaners, vinegar, or baking soda on certain finishes, so check your model’s manual first. (RTINGS.com)
6. Let Everything Dry Completely
Once you’ve cleaned it, make sure the crumb tray is completely dry before reinstalling it.
The inside of the toaster should remain dry.
Don’t plug it back in simply because the outside feels dry—if moisture has gotten inside, give it substantially more time and follow the manufacturer’s instructions.
7. Know When to Throw It Away
Sometimes cleaning isn’t enough.
If you notice:
- Damaged power cords
- Cracked or melted housing
- Exposed wiring
- Damaged heating elements
- Persistent burning smells
- Sparks or smoke
- A lever that doesn’t work correctly
Don’t keep using it just because it looks clean.
A toaster with damaged electrical components is not worth risking a kitchen fire. (University of York)
How Often Should a Toaster Be Cleaned?
If you use it every day, emptying the crumb tray about once a week is a sensible routine. A deeper cleaning can be done periodically or whenever you notice significant buildup. (RTINGS.com)
And honestly, after seeing what my tenant left behind, I think I’ll be adding “check the toaster” to my move-out inspection list.
The Golden Rule
Unplug. Cool. Empty. Brush. Wipe. Dry.
Never immerse a toaster in water, never poke around inside it with metal objects, and never sacrifice electrical safety just to make an old appliance look brand-new.
A few minutes of careful cleaning can get a surprisingly disgusting toaster looking respectable again—and help reduce the risk associated with accumulated crumbs. (RTINGS.com)
Always check your toaster manufacturer’s cleaning instructions, since designs and approved cleaning methods vary.